Auth0, Firebase, & AWS Lambda User Auth (Part 1)
Published on April 13, 2021
Last Revised on July 24, 2021
This series of posts describes one way to add user authentication to an Angular application using Auth0 and Firebase with the help of AWS Lambda.
Overall Takeaways
This guide shows one way to integrate Auth0, AWS Lambda, and Google Firebase together into the authentication of an Angular app. It is not a complete, polished, production-ready authentication solution, however you will learn a way to:
- Integrate Auth0 into an Angular App
- Create a route in API Gateway and secure it with a JWT
- Store (encrypt) and retrieve (decrypt) a Firebase Admin key in the AWS Parameter Store
- Mint a Firebase auth token in an AWS Lambda
- Authenticate into Firebase using a custom minted token
Prerequisites
- Auth0 Account - You can sign up here.
- Firebase Account - You can sign up here.
- Amazon AWS Account - Information about how to sign up can be found here. The sign up process is more involved than either Auth0 or Firebase. It does require a credit card which, if you are like me, left me feeling a little uneasy that I might mess something up and run up a huge AWS bill. You are not alone. There are ways to setup billing alarms to warn you when you exceed a threshold you specify. This tutorial will stay well within the AWS free-tier.
- Asynchronous programming, JavaScript Promises, RxJS Observables and Observers are used throughout this tutorial. Familiarity with these objects and concepts will help you understand how component data is being managed.
Guide Overview
- Part 1 - (YOU ARE HERE) Setup of the Angular App and setup & integrate Auth0 into it.
- Part 2 - Setup & integration of Firebase into the App.
- Part 3 - Setup of AWS API Gateway & Lambda to use by the app.
Let's get started!
Angular App Setup
I created a repo for a simple Angular starter app that contains placeholders for the integrations that we will be completing throughout this guide. To get started, clone the starter branch of the repository:
Next, install all the dependencies and startup the app to take a look at what's going on.
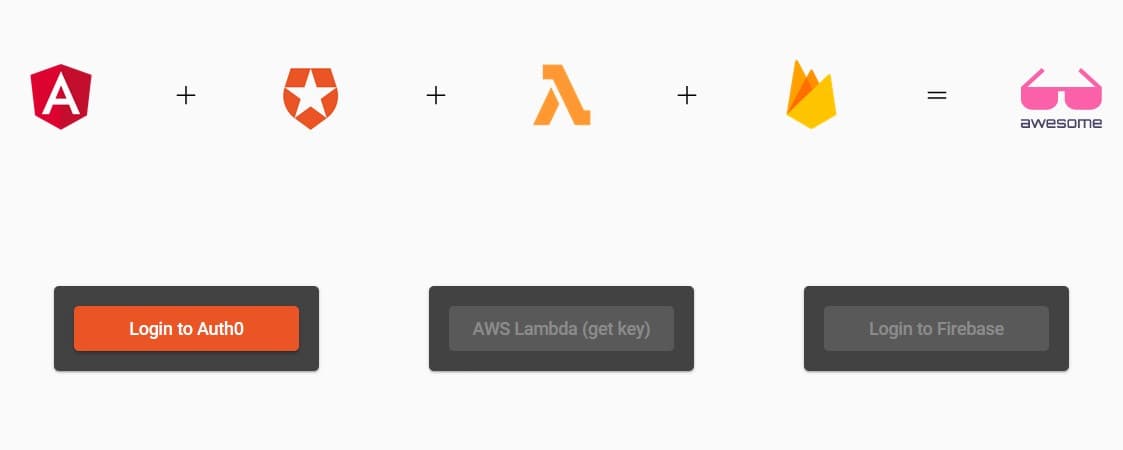
This guide focuses on the integration of external services so we will keep the UI simple and use this basic three-button Angular app. The idea beind the UI is that each button becomes enabled once the prior step in the authentication process is successfully completed.
- Login to Auth0 button: Authenticate using Auth0
- AWS Lambda (get key) button: Call the AWS Lambda and generate the Firebase auth token
- Login to Firebase button: Login to Firebase with the auth token to complete the authentication process
These behaviors are mocked out in the app so try it out. src/app/services/auth.service.ts maintains the state of the authentication progress. app.component.ts has the Auth service injected and references the Observables which stream any of change of state to their subscribers. The app template, app.component.html, subscribes to these and updates via the | async as the authentication state changes.
Use ctrl+c keys to stop the app.
Auth0 App Setup & Integration into the Angular App
Dan Arias of Auth0 wrote The Complete Guide to Angular User Authentication with Auth0 that really is the complete Auth0 guide. I learned a great deal from it and much of this section comes from Dan's writing. All credit to Dan.
NG-Conf & the Auth0 Dev Rel team posted has a great walkthrough guide called Authentication & Authorization in Angular with Auth0 on YouTube
Create the Auth0 App
Log into Auth0. Once logged in, you will arrive at your account dashboard. From your dashboard, click on the Applications sub menu item in the left-hand navigation menu.

The main content will display all of your existing appliations if you have any. Click on the Create Application button.

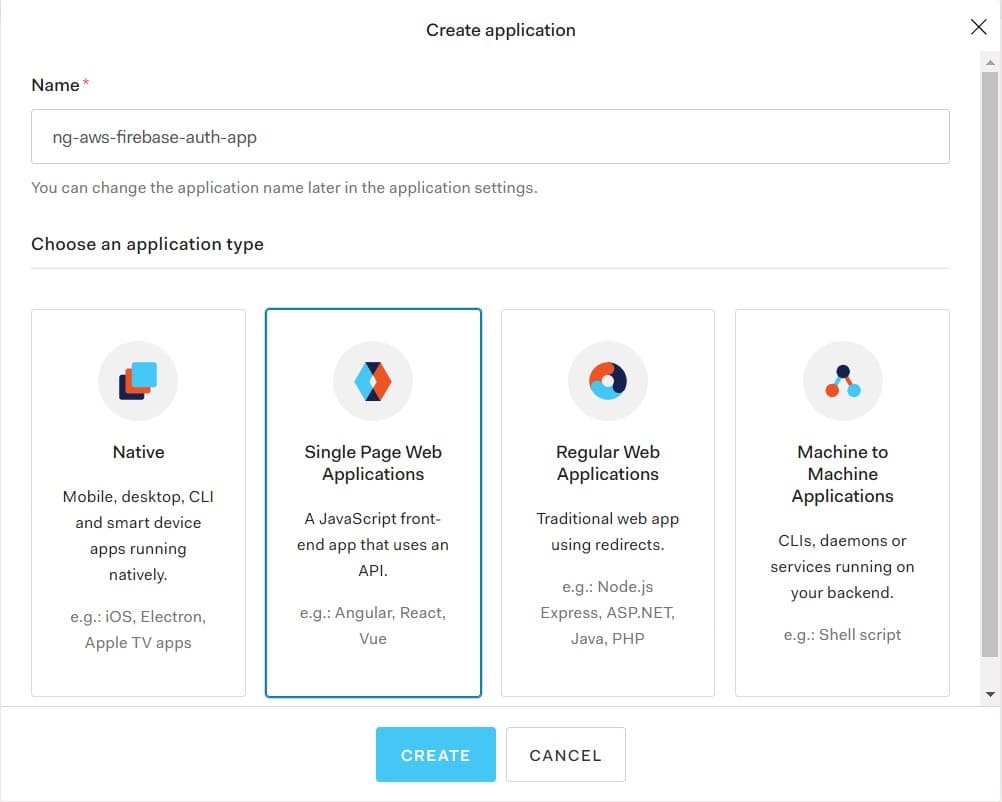
In the subsequent Create application modal, name your app and select the Single Page Web Applications application type. For this tutorial I will name the app ng-aws-firebase-auth-app. Click the Create button to create the app.
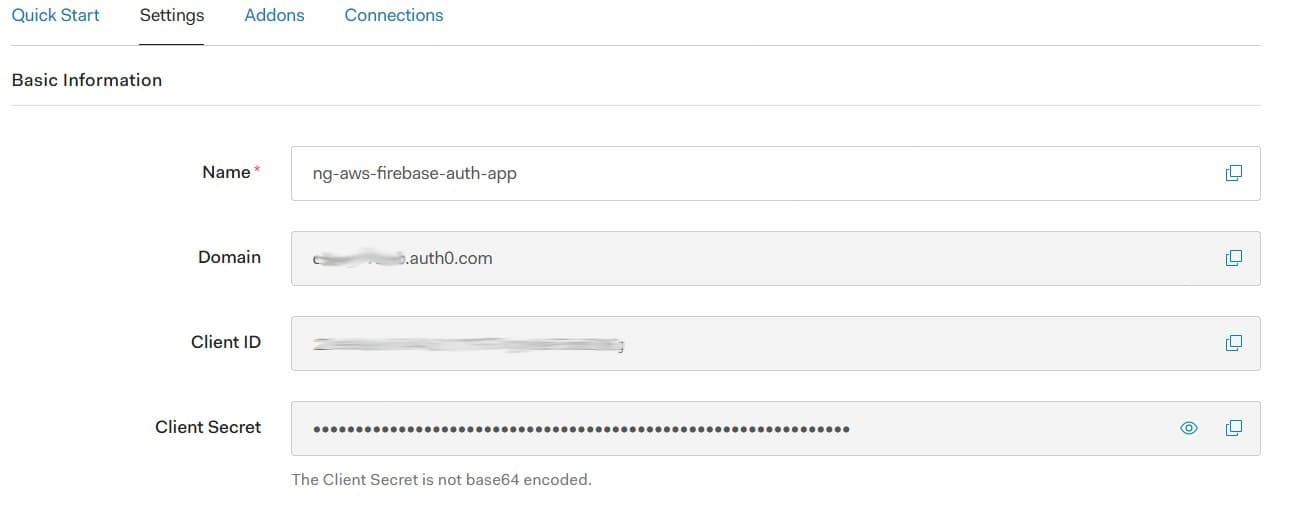
Once the app is created you will be routed to that application. Click on the Settings tab. In the Basic Information section, copy down the Domain and the Client ID and keep them somewhere close by. We will need them shortly.
In the Application URIs section, update Allowed Callback URLs, Allowed Logout URLs, and Allowed Web Origins with http://localhost:4200. Be aware that localhost:4200 is only being used for development. When you app make it to a production environment you will need to add the location (IP address) and port where your app is being hosted. Click the Save Changes button at the bottom of the page.
All done setting up the Auth0 app.
Integrate Auth0 into the Angular App
Open the Angular app. First thing we want to do is update the /tsconfig.json file and add "resolveJsonModule": true. This setting will allow us to import .json files into the app's TypeScript modules.
Create a file at the root of the Angular project and name it auth0-config.json. In this file you will use the Auth0 domain and client Id that we copied during the Auth0 app setup.
We can use that file's contents thanks to the resolveJsonModule flag we previously set. So update the src/environments/environments.ts file accordingly.
Now we will add the Auth0 SDK. From the terminal we can do that using Angular schematics:
With the Auth0 library now available to the project, we need to import it and load the module in src/app/app.module.ts.
Auth0 is now bootstrapped to the app. The next step is to use it. The Auth0 SDK is going to perform all the Auth0 specific authentication activities and report back to the Angular app with the results of the authentication attempt. We to want wrap this library into the app's existing Auth service.
Update src/app/services/auth.service.ts with the following changes
That's it. Auth0 should be wired in. Moment of truth. Start up the app and login/signup to Auth0.
If everything went as planned, once you click on the Login to Auth0 button, an Auth0 modal will pop-up requesting login.
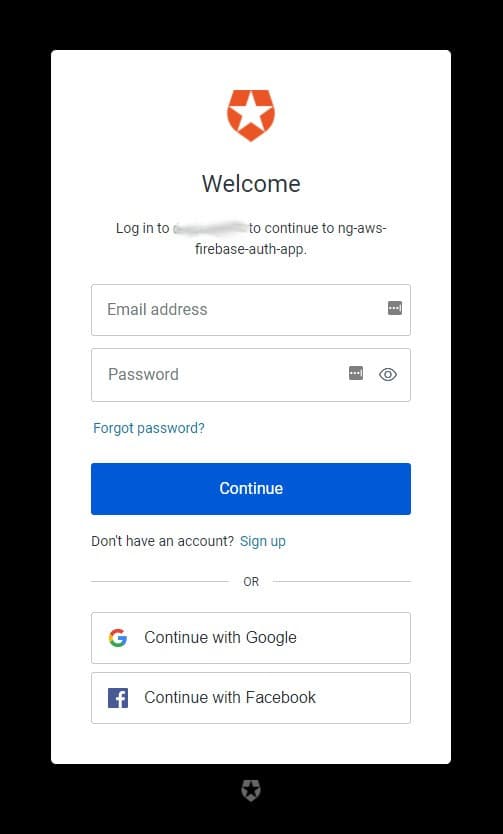
Finally, once you have authenticated using Auth0, your Auth0 user name will be displayed under the Logout of Auth0 button.
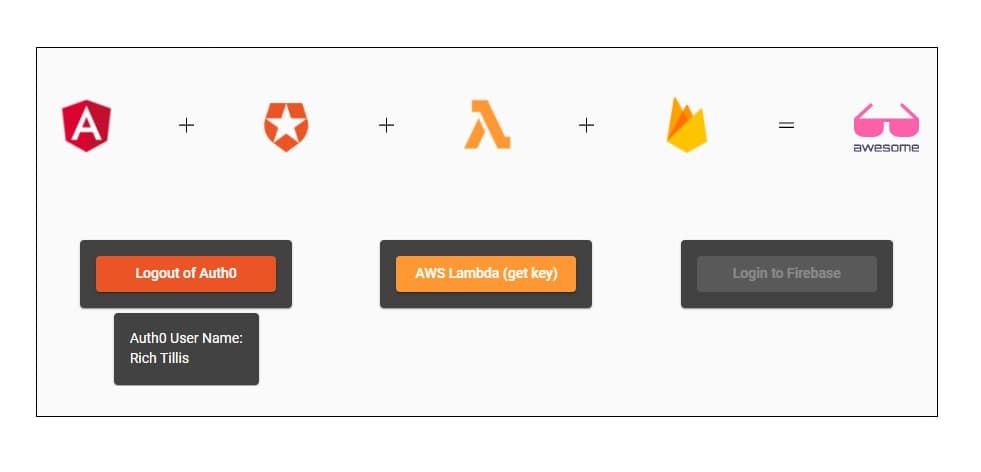
Congrats - Part 1 is complete!!
Wrap-up
In this post, we setup our Angular app, as well as an Auth0 application, and integrated Auth0 authentication into the Angular app. In Part 2 of this guide we will setup a Google Firebase project and integrate it into the app. Stay Tuned!
